• Home
  • About »
    • for Beginners
    • Disclaimer
  • Links »
    • Educational Resources
    • Parenting Websites
    • for Chicago Parents
    • Mommy Blogroll
  • Archives »
    • by Category
    • by Tags
    • by Date
    • Most Commented
    • Most Read
  • Contact

Practical Mama

Practical wisdom and balanced lifestyle for parents

  • Home
  • Parenting
    • Positive Parenting
    • Parenting Fun
    • Working Mother
    • Community Involvement
  • Baby and Child
    • Pregnancy
    • Delivery/Birth
    • Breastfeeding
    • Kids’ Health
    • Sleep
    • Potty Training
    • Kids’ Safety
  • Play & Learn
    • Arts and Crafts
    • Play
    • Books
    • Education
    • School
    • Birthday Parties
  • Home
    • Home Organization
    • Gardening
    • Sewing
    • Backyard Chickens
    • Product Review
  • Food
    • Recipes
    • Nutrition
    • Practical Cooking
    • Kitchen Tips
    • Menu Plan Monday
  • Health & Fitness
    • Health
    • Fitness
    • Beauty
  • Travel
    • Family Travel Tips
    • Chicago
    • International Destinations
    • US Destinations
  • Blogging
    • News
    • Giveaways
You are here: Home / Home / Sewing / DIY: Bedside organizer caddy with printable pattern

Sewing

DIY: Bedside organizer caddy with printable pattern

By Practical Mama |
This post may contain affiliate links

Pin923
Share
Tweet
Pocket
923 Shares
Bedside organizer caddy


We still have bunk beds in our children’s room. They don’t have bedside tables to put their things on. They like to read and write. My daughter needs a place to put her eyeglasses away and likes to mark her calendar. My son needs a place to put his bedtime medicine. I have been planning to make this bedside organizer caddy for a long time. In this post, I not only wrote how to sew a bedside organizer step by step with photos, but I also included a pattern below with dimensions to help you shorten the planning process.

I designed this bedside organizer based on our needs. My kids needed a place to store:
1. An alarm clock
2. Medicine and eyeglass case
3. Pens, pencils
4. Books, notebooks etc.
5. A calendar

So each pocket serves a specific purpose, which I think are pretty common for a bedside. It is also designed to work with their bunk bed. As you see, for these reasons, my design is different than the ones you can buy from a store.

IMG_9406

Materials used for this project

1. Background fabric (canvas)
2. Pocket fabric
3. Clear vinyl fabric for alarm clock pocket
4. Velcro (non-adhesive)
5. Other sewing materials: Thread, scissors, measuring tape etc.

Sewing Materials

IMG_7890

Instructions:

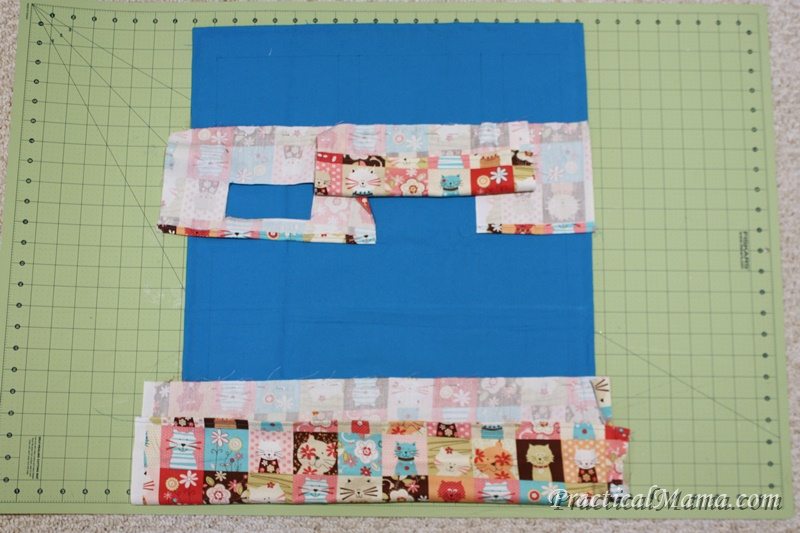
1. Cut your fabrics – dimensions are provided in this printable pattern

IMG_7891

2. Draw guiding lines for the placement of the pockets on your background fabric. You can use finished organizer dimensions provided in this printable pattern.

IMG_7893

3. Pin the pocket fabrics you cut to the background fabric using a sewing gauge on the guiding lines you drew.

IMG_7896

4. Cut out a window hole for the alarm clock pocket before pinning it. (I did it after sewing the pocket fabric on and it was hard to cut after. So do it before pinning)

IMG_7901

5. Cut your window out of the clear vinyl sheet and glue it on the fabric using a glue gun. Then pin the pocket fabric on the background fabric.

IMG_7897

6. Sew the bottoms of your pockets on.

IMG_7898

7. To attach the organizer on the bedrails, I used these velcro straps I had purchased from Home Depot. I strapped them on the railings and pinned where the organizers should go on. Then I sewed the straps on the back of the background fabric on where I marked.

IMG_7903

8. Here comes the hardest part. (Good news: this is the last step) Sew the sides and corners of the pocket. For bigger pockets it is easy. It might be tricky for the smallest pocket. I simply turned the pockets inside out, sewed them, cut the excess fabric, and turned them back.

IMG_7904

Here is a closer look at the alarm clock pocket corner.

IMG_7905

This is what it looks like from outside.

IMG_7909

Pockets are on and everything fits. Yay!

IMG_7910

Inside of the pocket.

Bedside organizer caddy

This is the finished bedside organizer caddy for my son. We hang it on the bedside railing.

IMG_0336e

This is my daughter’s bedside organizer. She hangs it to the frame of her brother’s bed. Therefore, it has a different style strap. I made these 3 x 2″ straps from background fabric and sewed (non-adhesive) velcros on.

I also made a small 1/2″ strip at the bottom for her to hang her calendar. You have to make sure it matches the width of the calendar exactly so that it doesn’t droop.

The nicest thing about these is, when I lay down with them for a good night’s hug, I don’t jump out with stabbing pain caused by a sharp object like a corner of a hardcover book or a pen anymore.

You can download my free Bedside Organizer Carry printable pattern by clicking on the image below. (Pattern is not to scale. You’ll need to measure your fabric before cutting.)

BedsideOrganizerCaddyPattern

If you liked this post, you might want to check out the decorative bunk bed curtains I made for the kids.

Bedside Organizers

You might also like:

  • Raising Everyday Makers
    Raising everyday makers
  • DIY Earring Holder Organizer
    DIY Earring holder that organizes studs and dangles
  • Storage Solutions for small bathrooms
    Smart storage and organization ideas for small bathrooms
  • Uses of headlamp
    10 uses of headlamp indoors

Thank you!

You have successfully joined our subscriber list.

.
« Previous Post: DIY: Minecraft knee patch for kids – w/ printable pattern
Next Post: DIY: Hairdressers cape with window »

Trackbacks

  1. Raising everyday makers - Practical Mama says:
    at

    […] house. When kids see us making or creating something instead of buying, such as Bunk Bed curtains, bedside organizer or gymnastics beam, they pick up on it and choose to make/create to solve a problem or fulfill a […]

    Reply
  2. Raising everyday makers - Practical parenting tips says:
    at

    […] house. When kids see us making or creating something instead of buying, such as Bunk Bed curtains, bedside organizer or gymnastics beam, they pick up on it and choose to make/create to solve a problem or fulfill a […]

    Reply

Leave a Reply Cancel reply

Your email address will not be published. Required fields are marked *

Get the newsletter

All the latest sent straight to your inbox so you never miss out!

Thank you!

You have successfully joined our subscriber list.

.


I am a mother of two and a type of person who you would call “Jack of all trades, master of none”. As you might guess from categories, I love my children, reading, sewing, gardening, traveling and cooking. I also work full time so I have to be practical to do all the things I want to do in a 24-hr-day. More About Me


More on Practical Mama

How to boost your immune system for winter
How to make your own bone broth
Record your own lullaby
Sandpaper Letters

Trending

  • Packing hot school lunches and keeping them warm
  • Packing list for traveling with school age children
  • 20 Thermos school lunch ideas
  • DIY: Spongebob Squarepants costume for kids
  • DIY: Cozy blanket with sleeves for children
  • DIY- How to build a balance beam
  • Packing list for traveling with babies and toddlers
  • How to turn flat sheets into fitted sheets
  • Massage for ear infection and earache
  • How to hack a pull up bar to use as gymnastics training bar for kids

Categories

Archives

Copyright ©2025, Practical Mama. All Rights Reserved. Custom design by Pixel Me Designs