• Home
  • About »
    • for Beginners
    • Disclaimer
  • Links »
    • Educational Resources
    • Parenting Websites
    • for Chicago Parents
    • Mommy Blogroll
  • Archives »
    • by Category
    • by Tags
    • by Date
    • Most Commented
    • Most Read
  • Contact

Practical Mama

Practical wisdom and balanced lifestyle for parents

  • Home
  • Parenting
    • Positive Parenting
    • Parenting Fun
    • Working Mother
    • Community Involvement
  • Baby and Child
    • Pregnancy
    • Delivery/Birth
    • Breastfeeding
    • Kids’ Health
    • Sleep
    • Potty Training
    • Kids’ Safety
  • Play & Learn
    • Arts and Crafts
    • Play
    • Books
    • Education
    • School
    • Birthday Parties
  • Home
    • Home Organization
    • Gardening
    • Sewing
    • Backyard Chickens
    • Product Review
  • Food
    • Recipes
    • Nutrition
    • Practical Cooking
    • Kitchen Tips
    • Menu Plan Monday
  • Health & Fitness
    • Health
    • Fitness
    • Beauty
  • Travel
    • Family Travel Tips
    • Chicago
    • International Destinations
    • US Destinations
  • Blogging
    • News
    • Giveaways
You are here: Home / Play & Learn / Play / DIY- How to build a balance beam

Play

DIY- How to build a balance beam

By Practical Mama |
This post may contain affiliate links

Pin4K
Share17
Tweet
4K Shares
How to build balance beam
diy balance beam materials


My daughter has been doing gymnastics for the last year. She really wants to improve to go up a level and in order to improve she needs to practice. One of the two pieces of gym equipment she has been asking for was a balance beam. Sturdy balance beams start around $180-$200 on the web. I couldn’t find any nearby on Craigslist. During my research, I’ve figured we can build a gymnastics balance beam that stays low and is used for simple practices.

Materials:

  • 2 4x4x8 wood
    • 1 piece uncut
    • 1 piece cut in 2 pieces of 2’, 4 pieces of 10 ¼. Keep the small remaining piece.
  • 4 pieces of 7” 4×1 wood
  • 3 yards soft padding: I purchased an outdoor sponge padding fabric. 1′ x 60″
  • 3 yards of cover fabric: I got fabric that looks like faux-suede from Jo-ann’s and used a coupon for discount.
  • Staple gun
  • Gorilla Glue
  • Loctite
  • Clamps for woodworking
  • 32 wood screws (2 1/2”)

Tools for woodworking

diy balance beam
Directions:

Balance beam

1. Cut the padding in 6” wide. Glue it on the side if the wood that is going to be walked on to prevent slipping.

diy balance beam

Staple the sides of the padding to the wood with a staple gun.

diy balance beam

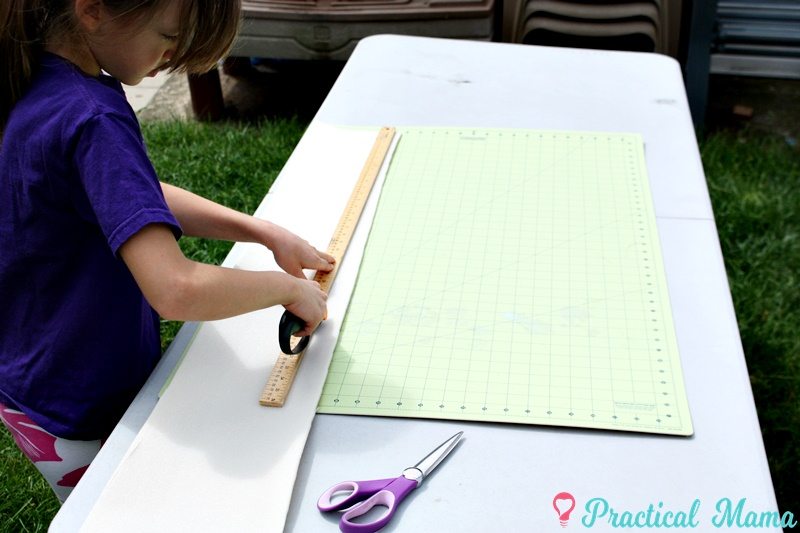
Cut the cover fabric about 16” wide.

diy balance beam

Cover the fabric around the wood, on the padding and staple it at the bottom. Fold the fabric at the ends and staple them.

diy gymnastics balance beam
diy balance beam

The bar is ready. We tried it to make sure it fits the spacing in between the two pieces of woods without pushing them outside.

Beam Stand

diy balance beam

Glue the 2 pieces of short on to the 2′ wood and wait until the glue is hardened while clamping them together.
Place the 4×1’s on each side of the stand. Drill holes for screws first, then screw 4 to fasten the two pieces together.

diy balance beam

Beam is ready. Stand is ready. Place the beam on the stand. You can put the small remaining piece of wood under the beam to prevent bending.

diy balance beam
diy gymnastics balance beam

My daughter loved it commenting that it feels like the real thing.

Material Cost:

Wood: 10.49 x2= $20.98
Fabric: $13.49 (with coupon)
Padding: $3.39 (with coupon)
Other materials: we had them
Total: $37.86

The time it took to build

Approximately 3 hours with kids helping us. It’s a great project to do it with the kids.


Important note: This instruction is provided for information purposes only. This is not a professional grade balance beam. Please keep that in mind and take all precautions to make sure the beam is stable, padded properly with a mat underneath, and used under supervision when practicing.

Home gymnastics practice equipment

You might also like:

  • How to hack a pull up bar to use as gymnastics training bar for kids
    How to hack a pull up bar to use as gymnastics training bar…
  • DIY: Laptop Stand for Fitness Equipment
    DIY: Laptop Stand for Fitness Equipment
  • Raising everyday makers
    Raising everyday makers
  • Fort Magic Fort Building Kit
    Fort Magic Fort Building Kit

Thank you!

You have successfully joined our subscriber list.

.
« Previous Post: Kids’ games and activities quick reference guide
Next Post: Daily themes for after school family fun »

Comments

  1. Ashley says

    at

    I love this idea. Want to make it for my daughter who has been doing Gymnastics in the USAG Excel program. Just wanted to know if this beam is okay to be left outside permanently? Didn’t know if the material used to cover it is weather/rain resistant?

    Reply
    • Practical Mama says

      at

      The material I used was not weatherproof. We use the beam both indoors and outdoors when the weather allows. When she’s done practicing we move the beam indoors.

      Reply
  2. Avonlea3 says

    at

    This looks like a great plan. Do you think it would work over a swimming pool? (My daughter wants to invent a new sport called swimnastics) We’d need to change the length to 13’ long, but other than that, we wouldn’t change anything. What do you think?

    Reply

Trackbacks

  1. Raising everyday makers - Practical Mama says:
    at

    […] us making or creating something instead of buying, such as Bunk Bed curtains, bedside organizer or gymnastics beam, they pick up on it and choose to make/create to solve a problem or fulfill a need. Whether it’s […]

    Reply
  2. How to hack a pull up bar to use as gymnastics training bar for kids - Practical Mama says:
    at

    […] tumbling but we purchased this inexpensive and good quality gymnastics mat. Then we built this DIY gymnastics balance beam. When she needed to work on her upper body and pullovers I looked at different gymnastics bar […]

    Reply

Leave a Reply Cancel reply

Your email address will not be published. Required fields are marked *

Get the newsletter

All the latest sent straight to your inbox so you never miss out!

Thank you!

You have successfully joined our subscriber list.

.


I am a mother of two and a type of person who you would call “Jack of all trades, master of none”. As you might guess from categories, I love my children, reading, sewing, gardening, traveling and cooking. I also work full time so I have to be practical to do all the things I want to do in a 24-hr-day. More About Me


More on Practical Mama

How to boost your immune system for winter
How to make your own bone broth
Record your own lullaby
Sandpaper Letters

Trending

  • Massage for ear infection and earache
  • Packing hot school lunches and keeping them warm
  • 20 Thermos school lunch ideas
  • How to prevent knee holes in pants
  • How to turn flat sheets into fitted sheets
  • How to hack a pull up bar to use as gymnastics training bar for kids
  • DIY- How to build a balance beam
  • Arts & Crafts: Glittery Eiffel Tower
  • Organizing LEGO instruction booklets
  • Is it normal for an infant not to poop for days?

Categories

Archives

Copyright ©2023, Practical Mama. All Rights Reserved. Custom design by Pixel Me Designs