
Fitted bed sheets are one of my favorite modern inventions. It annoys me to my core when flat sheets slip, get crumpled at the corner of the bed and I find myself on the bare mattress in the morning. When I buy a single bed sheet I always opt for fitted ones. However, I also buy duvet covers as a set and most of the bedsheets included in the sets are flat. I used to try to secure them with pins, clips, or grippers but it never worked as it should.
I’ve had numerous flat sheets which I haven’t been using for a long time. During a recent phase of purging and decluttering, I’ve decided to donated most of them and turn the 4 flat sheets of the sets I decided to keep into fitted sheets all at one sitting.
I’ve used 2 different methods. For the larger sheets which totally cover the mattresses and can be tucked underneath, I made fully enclosed the corner seams and fitted with elastic bands. For bedsheets that don’t fully cover the mattresses, I just sew large elastic bands at the sides of the corners.

Materials needed:
SEWING MATERIALS
METHOD 1 – ENCLOSED FITTED CORNERS
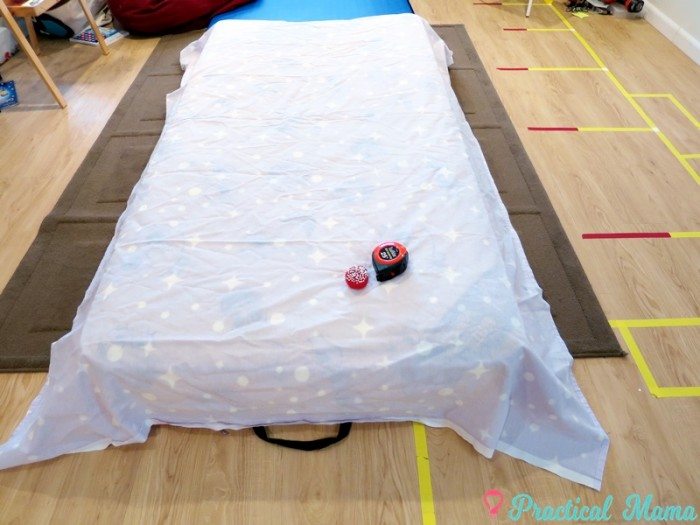
Lay the flat bedsheet on the mattress you need to fit for. Center the bed sheet with equal distance from both sides.
 Mark the corner lines where you need to sew on the flat bedsheet using pins. Mark where you need to tuck in, i.e. sew the elastic band casing, under the mattress.

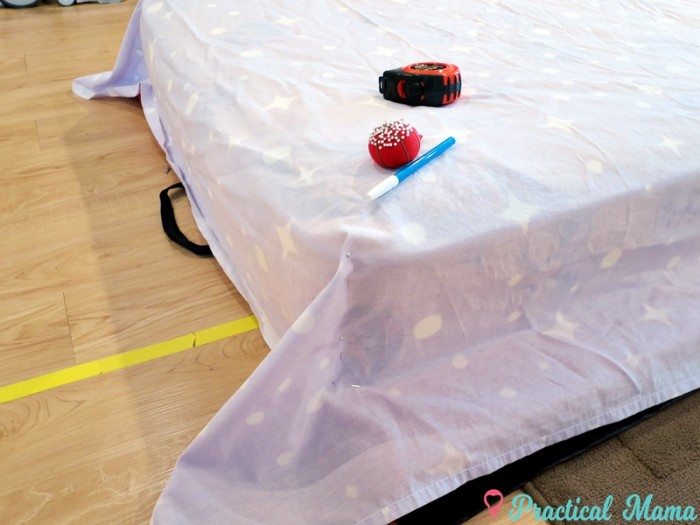
Lay flat sheet on a flat surface and mark where you need to cut and sew using washable fabric / sewing marker. Don’t forget to add 5/8” seam allowance on the corner seam.
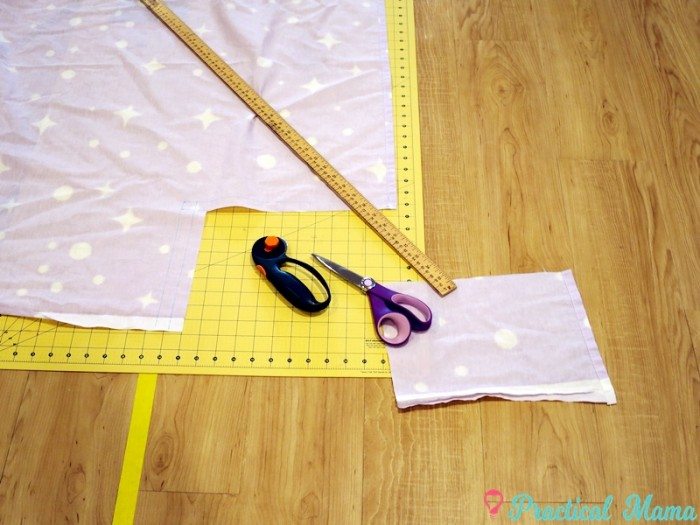
Once you make sure you’ve properly measured and calculated where the corner seam should go, cut the corners.
 Cutting corners at once: You can mark and cut one corner at a time like in the photo with the purple sheet or fold it do two of them at the same time like in the photo above with the pink striped sheet.
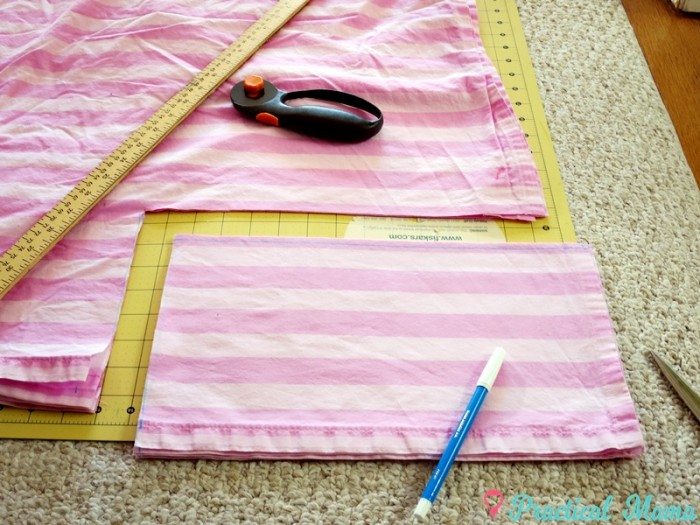 Cutting corners at once: Just make sure you’ve centered the bed sheet with even distance from each side when you are doing the initial measuring.
 Bring the newly cut corners together, right sides of the bedsheet touching together, and pin for the stitching.
 Stitch the corner seam and turn it inside out. This corner looks great!
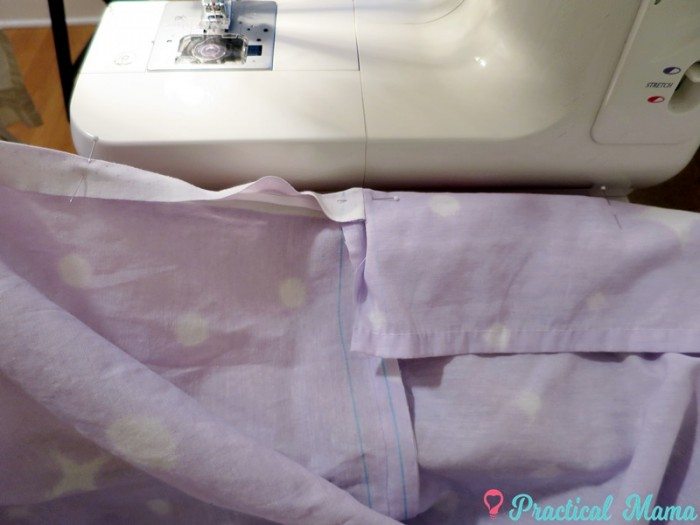 Two sides of the corner might be uneven as shown in the photo above. Using the shorter side as a guide, fold the fabric inside and pin to sew a casing wide enough to house the elastic band. You can see the upright pins on both sides marking the ends of the casing and horizontal pin in the middle. For this type of fitted sheet, I’ve used a 1/4″ narrow elastic band. Stitch along the fabric to make the casing.
 Sew the fabric inside and fasten the sides of the elastic band on to the edges of the casing. This whole process is not that hard but it takes time to measure properly, pin, and sew in the elastic band.
 Now repeat this for every corner. You can trim the excess fabric at the corners.
METHOD 2 – EXPOSED ELASTIC BAND
 As I’ve mentioned, with smaller flat bedsheets, which I couldn’t even tuck in, I wasn’t able to sew a corner seam.
 I’ve used a large knit elastic band and simply stitched them on the two sides of the corners. I did not sew a casing. The elastic bands stayed exposed.
 Here is another example of the exposed elastic band method. I folded the corners and sew them so that the corner wouldn’t extend out and it would look more enclosed.
 I stitched the folded ends of the elastic bands behind the fabric using both straight and zigzag stitches so that they keep secured and edges would not tear apart. As expected this method is much easier and quicker to complete.
BEDSHEET HOLDERS


I am a visual learner and I got lost at the pin the corner for stitching. Once you cut out the corner – where do you initially stitch and where do you make the casing for the elastic.
thank you
Harriett,
If you look at the first photo under the heading “Method 1”, the corners are pinned. I marked those pinned lines with a washable marker and cut the rectangle out. Then I bring the newly cut lines together, right sides of the fabric touching and stitched to make the corner.
On the 8th photo of the purple bedsheet, corners stitched together, side lengths were not even. I took the shorter, left side as a guide, then folded in, to put the elastic band in.
I hope this helps.
Thank you
It doesn’t help that you apparently switched sheets midway through the demo.
Erin,
Method 1 starts with the purple bedsheet. Then I added two photos of a pink bedsheet to provide an additional example of cutting multiple corners at once. Then the sequence continues with the purple bed sheet.
Uh, just to get it out there, flat sheets aren’t TO cover the matress, they’re to cover the person. Fitted sheet, flat sheet, topper (quilt, comforter, duvet).
It was to cut down on washing heavy toppers as well as keep warmth in during a time when heating wasn’t as we have now.
Granted, these days most people don’t use flats as we have better heating and no longer hand wash our sheets/toppers.
Beyond that! The DIY is well done and informative, thank you. I was looking for a way to do this for a velveteen blanket and you solved my dilemma. 😁
What is the measurement of corner to cut for the corner squares. Thanks
I measured it to the height of my mattress + 1″ to be able to fit underneath it.
Why is one side longer than the other? What do you do about the longer side. You didn’t say, or maybe you didand I just didn’t understand it.
Your project is fantastic. I have grandchildren that I have made crib sheets for it is the easiest thing to do. I have a lot of sheets from my grandma and my mom. While going through them I noted some had small holes mostly because age and where they were kept. I loved finding your post this way I can have use of the sheets to make some
fitted ones. I understand everything and it was easy to do. Thank You so much for sharing.
Would you be so kind and guide me in the following I have 2 KING SIZE FLAT SHEETS and 2 KING SIZE FITTED SHEETS. I’m trying to down size them to QUEEN SIZE FITTED SHEETS. I’m having problems starting with the fitted sheets the corners ,then putting elastic all around loosely still to big on mattress
MATTRESS 60 x 80 x 12″ depth
Thank – you in advance
i