• Home
  • About »
    • for Beginners
    • Disclaimer
  • Links »
    • Educational Resources
    • Parenting Websites
    • for Chicago Parents
    • Mommy Blogroll
  • Archives »
    • by Category
    • by Tags
    • by Date
    • Most Commented
    • Most Read
  • Contact

Practical Mama

Practical wisdom and balanced lifestyle for parents

  • Home
  • Parenting
    • Positive Parenting
    • Parenting Fun
    • Working Mother
    • Community Involvement
  • Baby and Child
    • Pregnancy
    • Delivery/Birth
    • Breastfeeding
    • Kids’ Health
    • Sleep
    • Potty Training
    • Kids’ Safety
  • Play & Learn
    • Arts and Crafts
    • Play
    • Books
    • Education
    • School
    • Birthday Parties
  • Home
    • Home Organization
    • Gardening
    • Sewing
    • Backyard Chickens
    • Product Review
  • Food
    • Recipes
    • Nutrition
    • Practical Cooking
    • Kitchen Tips
    • Menu Plan Monday
  • Health & Fitness
    • Health
    • Fitness
    • Beauty
  • Travel
    • Family Travel Tips
    • Chicago
    • International Destinations
    • US Destinations
  • Blogging
    • News
    • Giveaways
You are here: Home / Home / Home Organization / DIY Arts & Crafts Table for Kids – IKEA Hack

Home Organization

DIY Arts & Crafts Table for Kids – IKEA Hack

By Practical Mama |
This post may contain affiliate links

Pin34
Share
Tweet
34 Shares

DIY Children's Craft Table
We set up this small table when my kids were much smaller for them to eat snacks by themselves and scribble once in a while at one corner of our living room. During the time it became a full-fledged craft and drawing place and causing a terrible mess in our living room. Instead, I wanted to build a drawing, painting and crafts table for my two kids, which would also store all of their materials.

I have two kids, so I needed a table that can be accessed from both sides. A big table that would use up a lot of space in the living room so I need an arrangement of medium size. I couldn’t find exactly what I wanted ready for sale but I knew what I wanted so I created this design.

DIY Children's Craft Table
Browsing IKEA’s website helped me a lot. For this project I got:

  • TROFAST Frame,
  • VIKA AMON table top (L: 40 1/8″),
  • 2 GRUNDTAL rails,
  • 2 MALA paper rolls

I wanted to use the smaller VIKA AMON, but 22″ high TROFAST frames came in only single or triple sections. So I asked for help from a dear friend, who is experienced in carpentry projects and had the necessary tools. Here is how to build it:
DIY Children's Craft Table

DIRECTIONS:

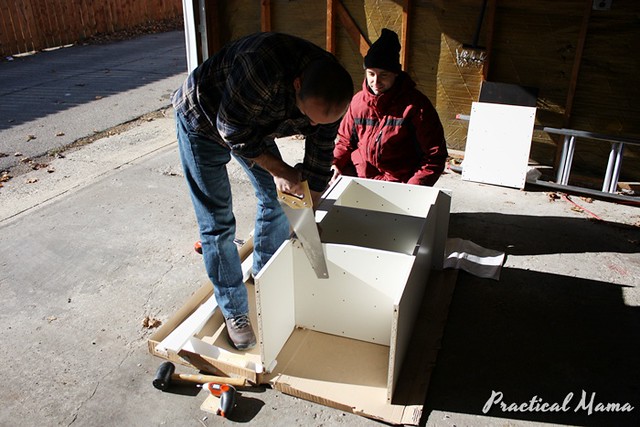
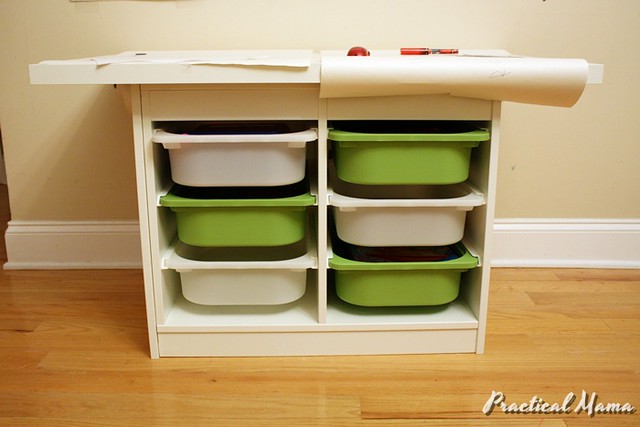
1. Partially (only two sections) assemble TROFAST.
DIY Children's Craft Table
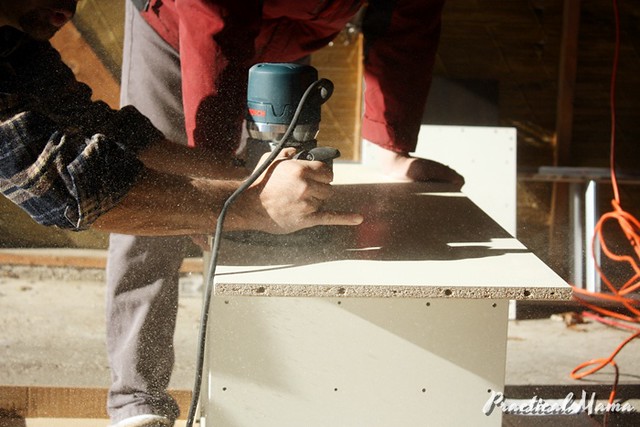
2. Cut the extending wood, beyond the second section, preferably, with an electric saw.

DIY Childrens Craft Table
3. Add the bottom panels and cut them as well.

DIY Children's Craft Table
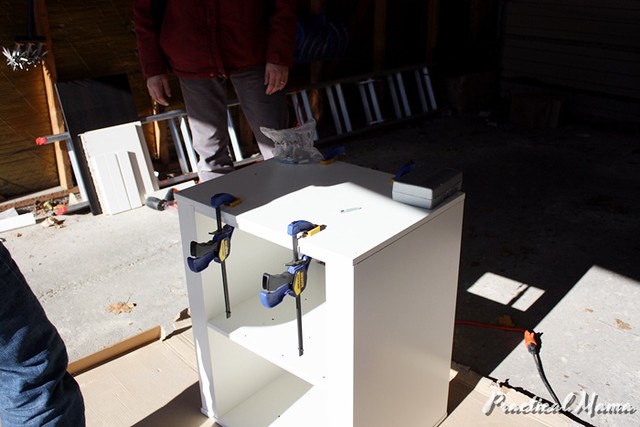
4. Put the third (remaining) side panel on the top of the side you cut, so that the height on both sides will be even.

DIY Children's Craft Table
5. Install the GRUNDTAL rails. In order to fit them and still be able to unscrew the pipe to put on a roll, you have to cut the pipes about 1.5″ both. Before cutting the pipes hammer the part where you put the screw in, a little bit more than 1.5″ back. Do not forget to push these back before cutting the pipe.

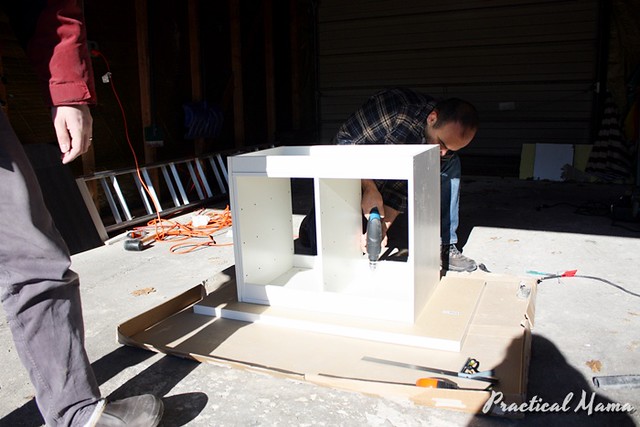
6. Fasten TROFAST onto VIKA AMON with screws. We used 10 wood screws.

DIY Children's Craft Table7. Put the MALA paper rolls on.

8. Put the drawer rails in and insert the drawers.

DIY Children's Craft Table
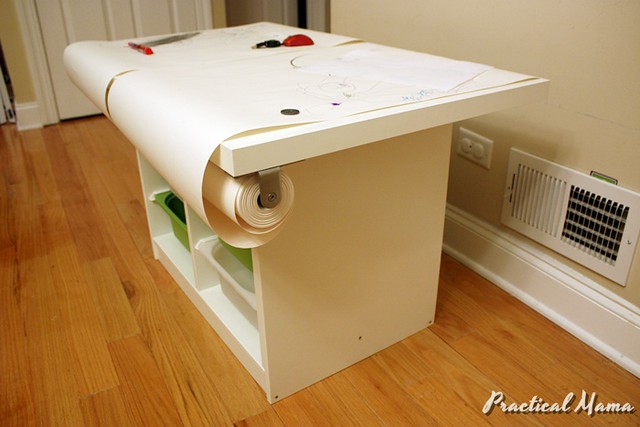
We actually fixed the tabletop on TROFAST before installing the paper rails (which was our only mistake). Later we had to move the tabletop a little bit to the side so that the rail holders would fit on the other side.

It is very stable. It is a little bit higher than an average children’s craft table since total height is 22″+1 5/8″.

Finally:

1. Introduce the new craft table to the kids.
2. Make sure they learn to put away their materials and scraps into the drawer bins.

Optional 1:

If you have enough space, you can make a bigger table with larger VIKA AMON table top (L: 48 3/8′) on top of a complete TROFAST frame.

Optional 2:

You can put LEGO base plates on the table and use it as a LEGO workstation as well. I am thinking about adding this feature on by gluing base plates on a thin plywood I got from IKEA as-is dept and fixing it on the table top with hinges. It might be too much. Maybe I’ll just make it and keep it separate/portable.

Pin it for later:

You might also like:

  • Redesigning our playroom
    Redesigning our playroom
  • Repurpose: From toy chest to ottoman bench
    Repurpose: From toy chest to ottoman bench
  • DIY - LEGO table and storage
    DIY - LEGO table and storage
  • 10 tips to get your children pick up after themselves
    10 tips to get your children pick up after themselves

Thank you!

You have successfully joined our subscriber list.

.
« Previous Post: Souvenir shelf for kids’ room
Next Post: Moving into new bunk beds »

Leave a Reply Cancel reply

Your email address will not be published. Required fields are marked *

Get the newsletter

All the latest sent straight to your inbox so you never miss out!

Thank you!

You have successfully joined our subscriber list.

.


I am a mother of two and a type of person who you would call “Jack of all trades, master of none”. As you might guess from categories, I love my children, reading, sewing, gardening, traveling and cooking. I also work full time so I have to be practical to do all the things I want to do in a 24-hr-day. More About Me


More on Practical Mama

How to boost your immune system for winter
How to make your own bone broth
Record your own lullaby
Sandpaper Letters

Trending

  • Packing hot school lunches and keeping them warm
  • Massage for ear infection and earache
  • How to prevent knee holes in pants
  • DIY- How to build a balance beam
  • Why do kids who have hard time waking up during school days, wake up early during weekends?
  • How to hack a pull up bar to use as gymnastics training bar for kids
  • Arts & Crafts: Glittery Eiffel Tower
  • 20 Thermos school lunch ideas
  • How to make a robot with used cardboard boxes
  • How to turn flat sheets into fitted sheets

Categories

Archives

Copyright ©2022, Practical Mama. All Rights Reserved. Custom design by Pixel Me Designs